Two Factor Authentication (2FA)
Setting up 2FA
- Log in to Unitrends as a superuser.
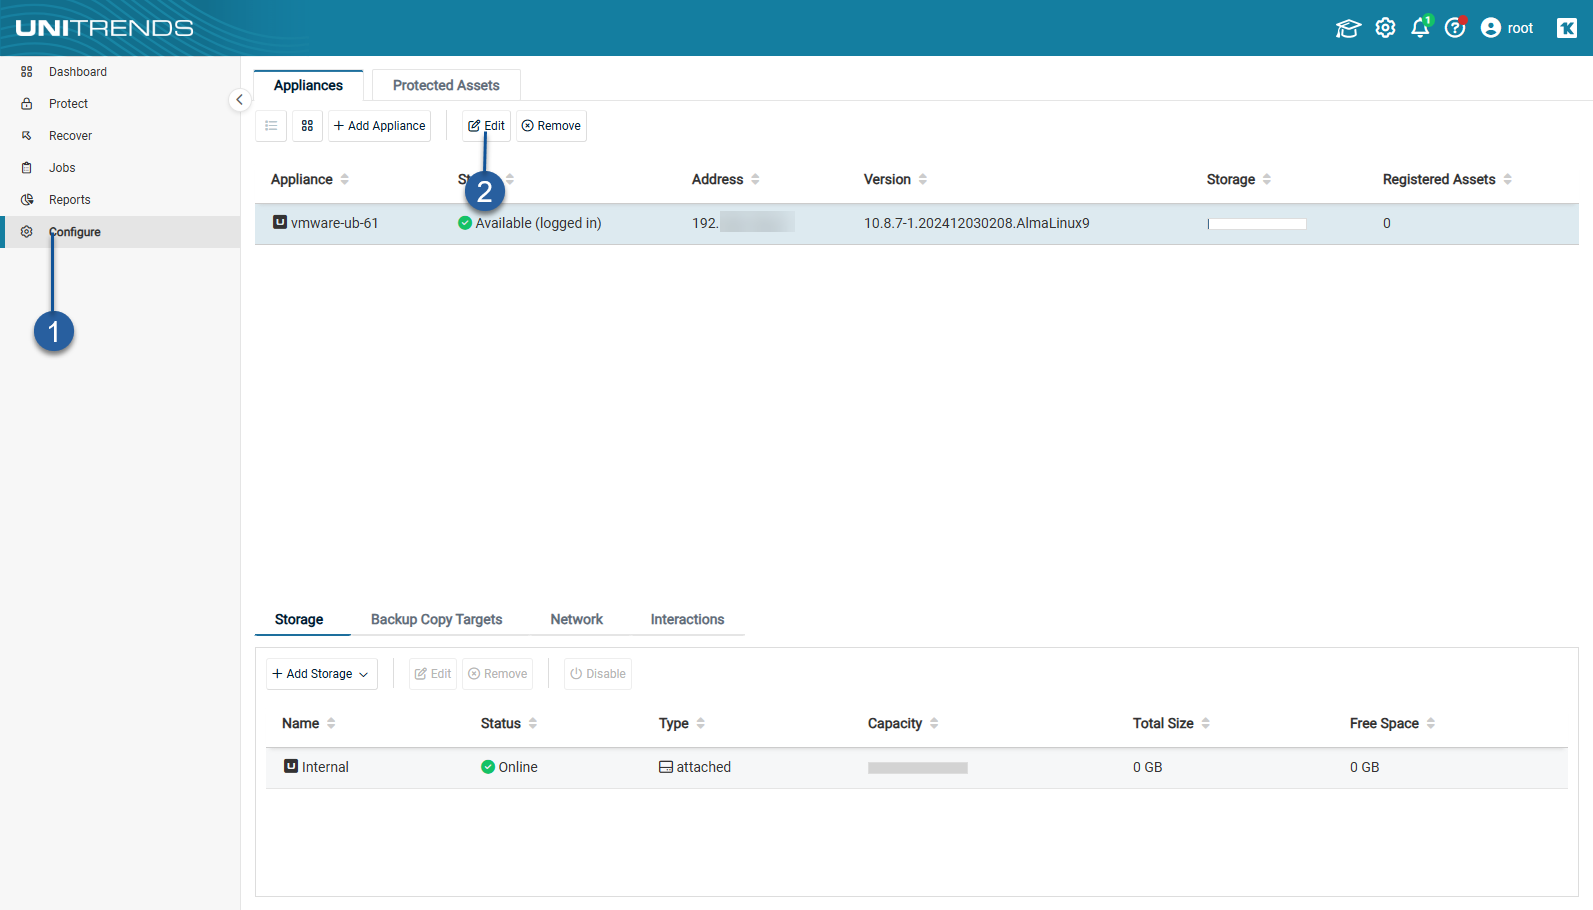
- From the left menu, select Configure.
- Click Edit.

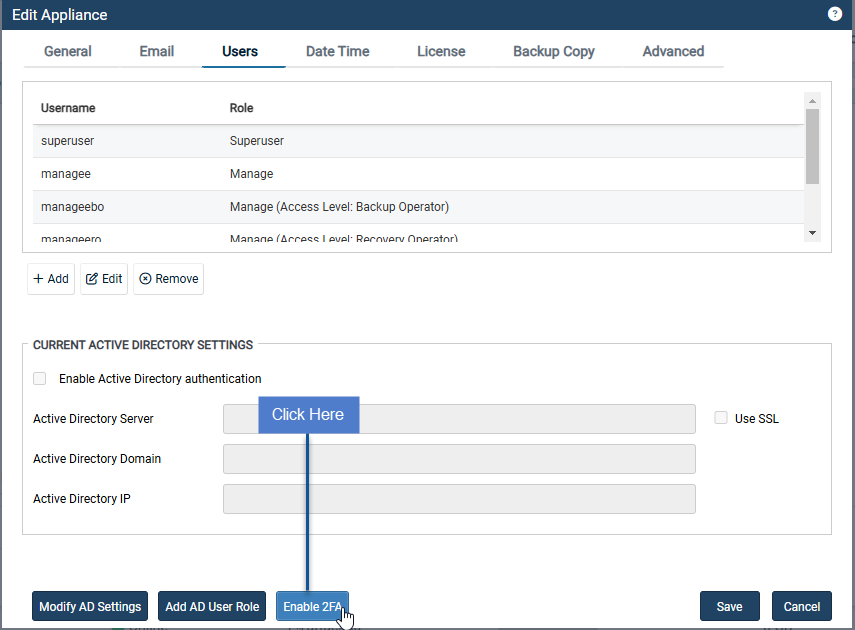
- Click the Users tab.
- Click the Enable 2FA button at the bottom.

- Enter Enable to proceed.

- Acknowledge the success message.

NOTE After upgrading of UB, the browser must be hard-reset.
To hard-reset your browser:
1. Hold down the Shift key and click on the reload icon on your browser's toolbar.
2. Use keyboard shortcuts such as Ctrl+F5 or Ctrl+Shift+R.
NOTE All devices used in authentication must have their "Set time automatically" options set to true.
First 2FA login
- On your first login after 2FA is enabled, you will see the 2FA welcome message.

- Click Next.
- Click Enable on the two-factor authentication requirements dialog.
- Click Set up 2FA to begin setting up 2FA.
- Click Next on the two-factor authentication dialog.
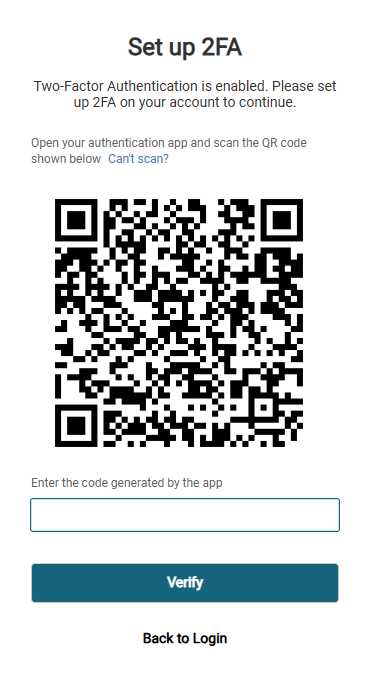
- See the Set up 2FA screen.

- Scan the QR code with your authentication app.
- Enter the code generated by the app.
- Click Verify.
- Click Continue to UI.

2FA logins after setup
After your first 2FA login, use your authentication app to get an authentication code for each login.
Reset 2FA for a user via the UI
- From the left menu, select Configure.
- Click Edit.
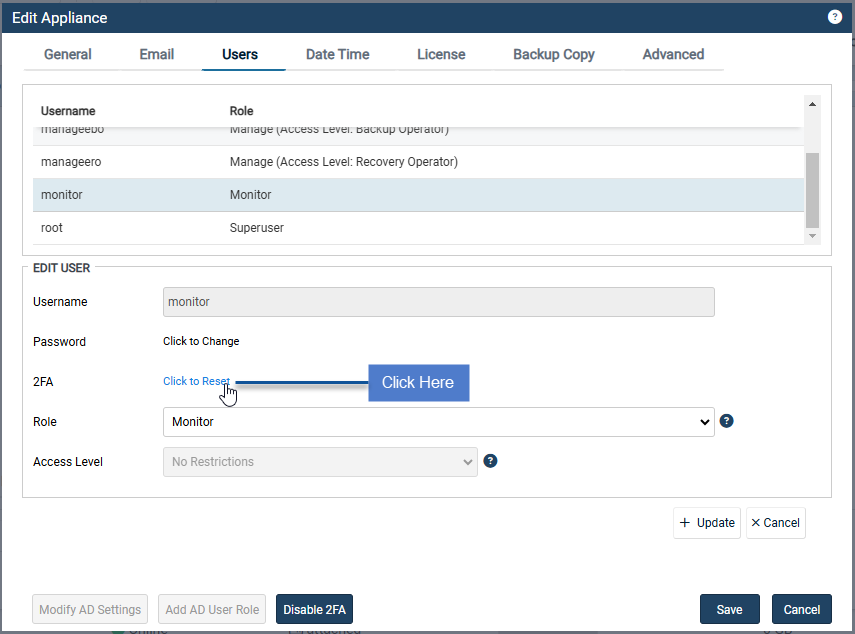
- Click the Users tab.
- From the Username list, select the user to perform 2FA reset.
- Click Edit.

- Click on Click to Reset.

- Click the green check mark to confirm.

- The success message confirms that 2FA was reset for your user.


Reset 2FA via dpuconfig menu
NOTE The dpuconfig menu is available via console on both physical appliances and virtual UB's.
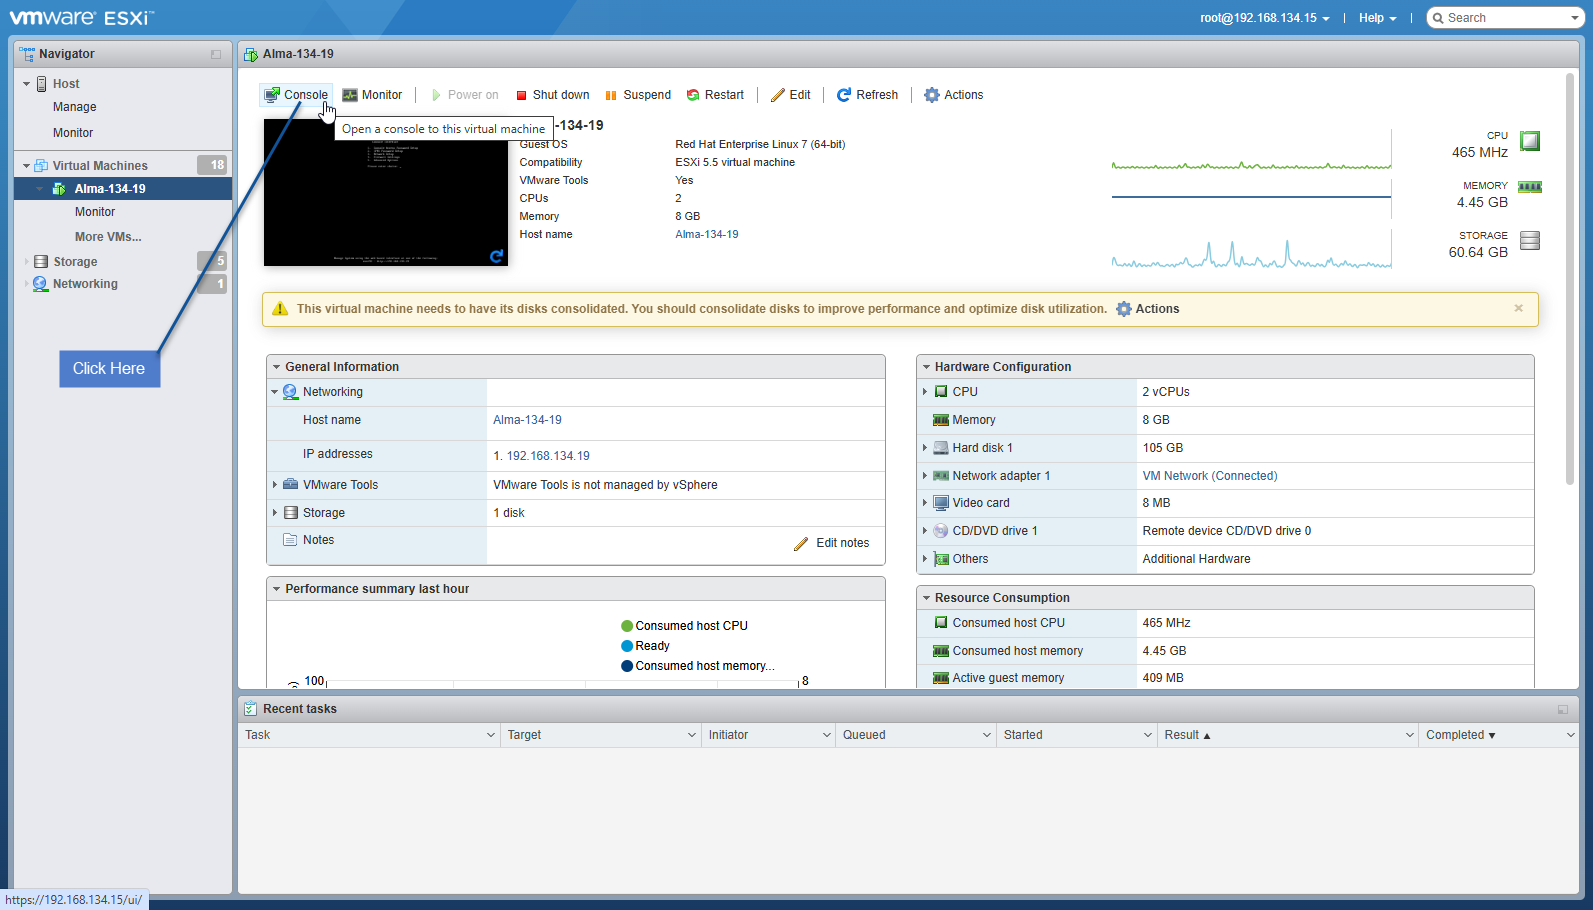
- Access the console of your virtual UB.
- Choose your virtual machine.
- From the Console menu, select Open browser console.

- Select Open browser console.
- On the Console Interface, enter 5 for Advanced Options.

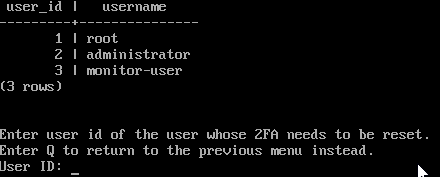
- On the Advanced Options Menu, enter 3 for Reset User 2FA for UI
- Enter the id of the user to have their 2FA reset.

- Acknowledge the success message to return to the console menu.