Remote appliance management procedures
Use these procedures to manage existing appliances, add appliances you want to manage from another appliance’s UI, and remove appliances you no longer want to manage. For details on configuring individual appliance settings, see Appliance settings.
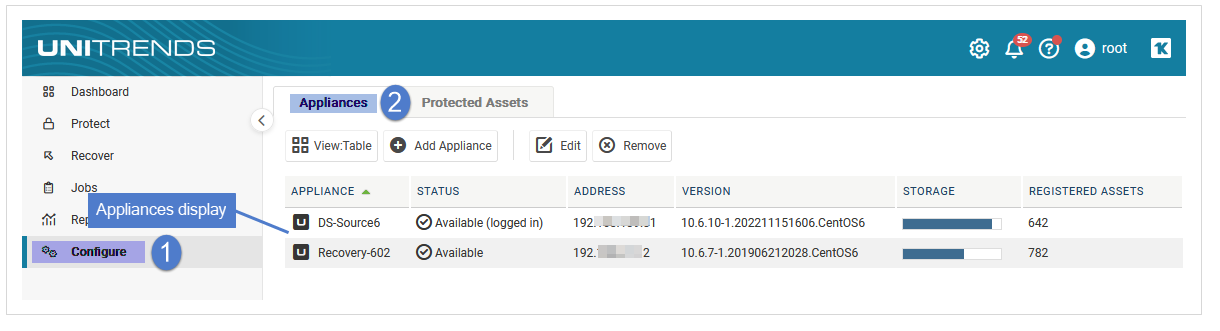
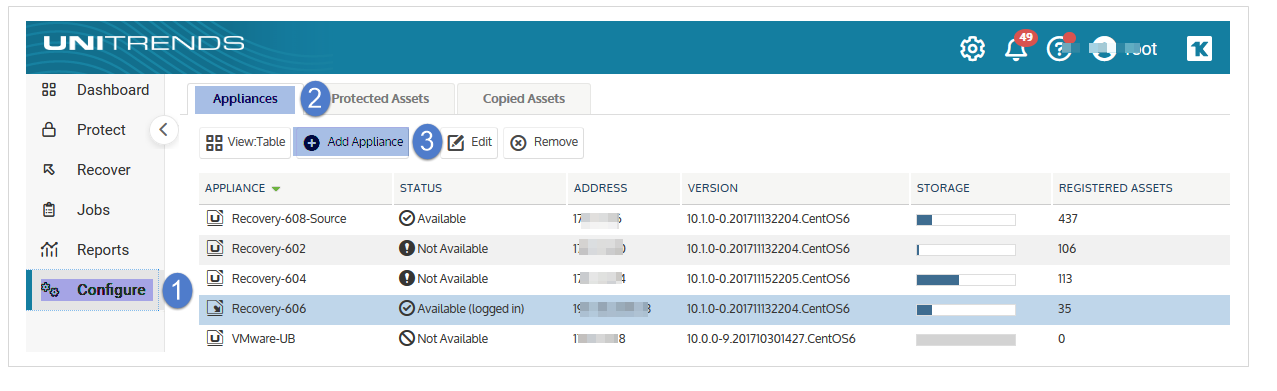
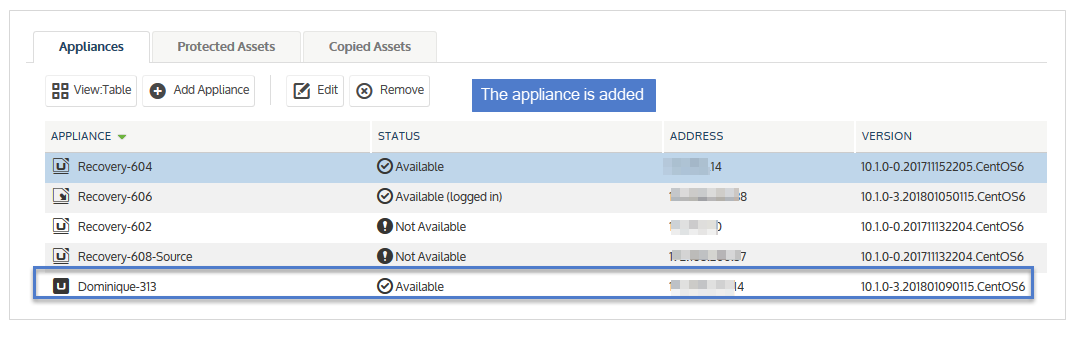
Click Configure to view appliances on the Appliances tab. You can view appliances as a table or list. The list view is better for small deployments, while the table view is better for larger deployments.
| • | To view appliances in a list, click View: List. |
Each row in the list shows the appliance’s name, status, IP address, Unitrends software version, storage, and number of registered assets.
| • | To view appliances in a table, click View: Table. |
Table view displays appliances in tiles on the left. Each tile includes the appliance’s name and status. Additionally, Logged In displays in the tile of the appliance you are currently logged in to. Select a tile to view details about the appliance, such as name, IP address, description, and Unitrends software version.
The following appliances display on this tab:
| • | The appliance you are currently logged in to. Its status is Available (logged in). |
| • | Any additional appliances that this appliance is managing. Managed appliances display with the status Available. |
| • | If the appliance you are logged in to has been configured as a backup copy target, its source Unitrends appliance displays. The source appliance can be in the following statuses: |
| – | Pending means the backup copy request is pending. |
| – | Not Available means the appliance is configured as a backup copy source only and cannot be managed from this UI. (To enable management, simply click Edit, check Enable Management of this appliance, supply User Name and Password credentials, and click Save.) |
| – | Available means you can manage the source appliance from this UI. |
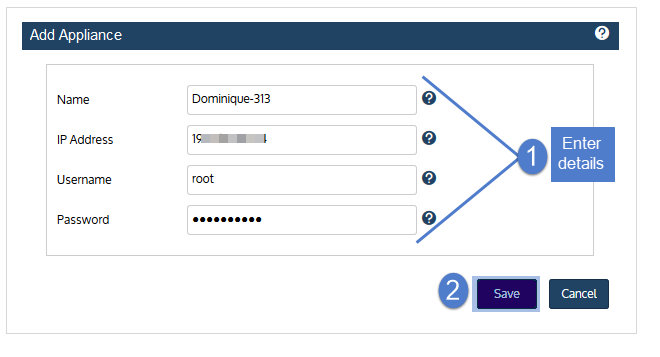
| 1 | On the Configure > Appliances page, click Add Appliance. |
| 2 | Enter the Name you want to use to identify the appliance. |
| 3 | Enter the IP Address of the appliance. |
| 4 | Enter the User Name and Password you used to configure the appliance. |
| 5 | Click Save. |
Use the To add an appliance procedure to add a remote appliance. Once you add a remote appliance, it displays on the Configure > Appliances tab in Available status. You can then manage operations on the remote appliance as your user role permits, with some exceptions (for example, you are unable to manage users and SLA policies on remote appliances). To manage an appliance from this UI, the appliance must have an Available status.
Appliance status information includes:
| Status | Description |
|---|---|
| Available (logged in) | You are logged in to this appliance and can manage its operations. |
| Available | This is a remote appliance that can be managed from this UI. |
| Not Available |
The appliance is configured as a backup copy source only and cannot be managed from this UI. To enable management, simply click Edit, check Enable Management of this appliance, supply User Name and Password credentials, and click Save. |
| Pending |
This is a remote appliance that is requesting permission to send backup copies to the appliance you are logged in to. Click ! to accept or deny the request. |
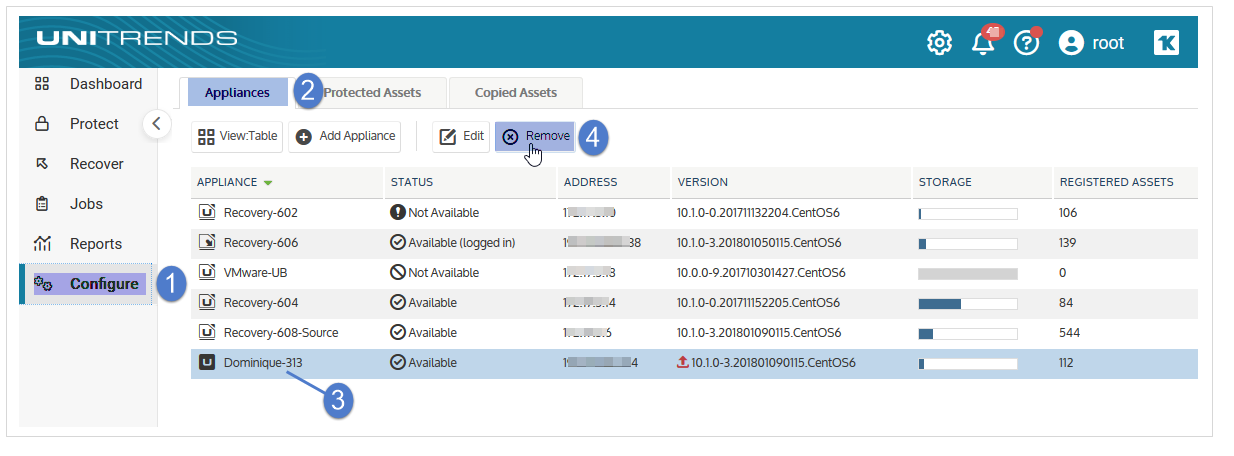
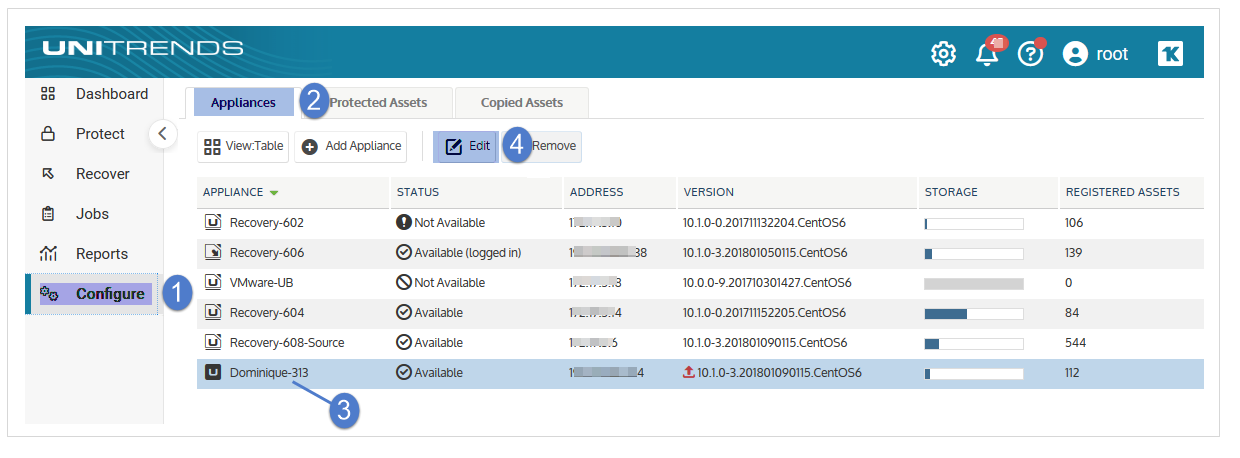
| 1 | Log in to the managing appliance. |
| 2 | Go to Configure > Appliances and select the appliance you want to remove. |
| 3 | Click Remove. |
| 4 | Click Confirm. |

Make sure that there are no jobs running prior to upgrading your appliance. Once the upgrade begins, any running jobs terminate.
| 1 | Log in to the appliance UI as a user with administrative credentials. |
| 2 | Click the gear icon and select Check for Updates. |

| 3 | A list of available updates displays. Click Apply Update to begin the installation. |

| 4 | For some appliances, software maintenance is required with the update. If so, you see this message and the update will take some extra time: |
Note: If you do not see this message, maintenance has already been performed on the appliance.
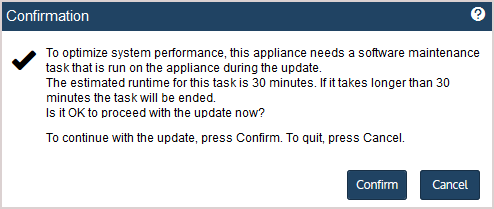
Do one of the following:
| • | Click Confirm to continue with the update. |
| • | Click Cancel to quit. (You can then install the update at another time.) |
| 5 | During the upgrade, you see status messages as packages are installed. If you have trouble with the installation, see Troubleshooting the upgrade for tips. After the installation completes: |
| • | Clear your browser cache, then close the browser. |
| • | Open the browser and log back in to continue working with your appliance. |
Note: If you receive a message indicating that you need to reboot the appliance to take advantage of the new kernel installed during the upgrade, you can either reboot now or reboot at a later time. If you reboot now, do the browser steps above after the appliance boots. (If you do not receive this message, the kernel was not updated and a reboot is not required.)
In rare instances, your first attempt to update the Unitrends appliance might not be successful. See the following table for a description of upgrade issues and steps you can take to resolve them:
| Issue | Next steps | ||||||
|---|---|---|---|---|---|---|---|
|
The update times out because some of the packages did not install. |
If the installation stops and you receive a message stating a package did not install successfully, in most instances you can resolve the issue by clicking the refresh arrows and attempting the update again. If necessary you can repeat this multiple times until the update completes. See Timeout error when upgrading a Unitrends appliance for more information. |
||||||
|
The appliance is unable to download the update packages. |
There are two possible solutions if your appliance is unable to download packages:
|
||||||
| An error message displays stating that the managing system must be updated. |
To update the appliance, you must first update any other appliances that are managing it. Verify that any backup copy target appliance and any other managing appliances are running the latest release. Upgrade these appliances as needed. You can then upgrade any appliances that they are managing. |
||||||
|
No data displays in the UI after installing appliance updates. |
To resolve this issue:
|
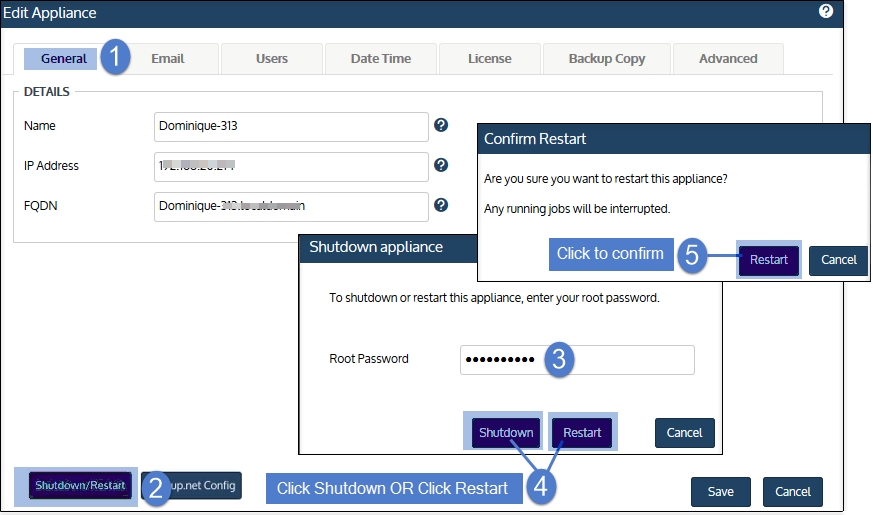
| 1 | On the Configure > Appliances page, select the appliance and click Edit. |
| 2 | On the General tab, click Shutdown/Restart. |
| 3 | Enter the appliance root user password. |
| 4 | Click Restart to power down and restart the appliance OR click Shutdown to power down the appliance only. |
| 5 | Click Restart or Shutdown again to confirm. |